Tag: 35mm film

Scanning film tutorial, showing how to process 35mm film in Photoshop CS5. Start with your negative, be sure your scanner doesn't export the image as a positive. You want your image to looks like this. Negative is brown, orange and inverted. I cropped the image out of the film reel already, but you can crop anytime. This is a photo from 1978 when my mum graduated university so the negatives are quite old. Add an "invert" correction layer. Find that option here (Layer>Add Correction Layer>Invert) Or here (the inverted circle at the bottom of the layers panel) Your negative is now a positive! But it's pretty blue, huh? To fix this we'll edit the curves. Add the 'curves' adjustment layer, it'll be in the same place 'invert' was. Then in the Adjustments window, we'll click on the dark eyedropper. Use that to click on the darkest part of your photo. I chose the deepest part of her graduation gown sleeve. But the photo is still kind of muddy. We need to use the white eyedropper to pick up the lightest part of the photo now. I'll use her white sash. And just like that we have pretty good colours! As a final step, I'll use the curves' dark and light sliders to adjust the contrast of the photo. Play with the sliders until you get something you're happy with! Don't forget to use adjustment layers if you want to do any other fixes, since they're not destructive you can always turn them on/off if you're not happy with an edit. Here's my finished version compared to a print I have from the same roll of film. This print is also from the 70s. The print is very rich but really unnatural compared to what I've got from the negatives. Though, if you want this look I'm sure you could use adjustment layers to replicate this effect. So go forth and process your negatives yourself. It's quite easy!

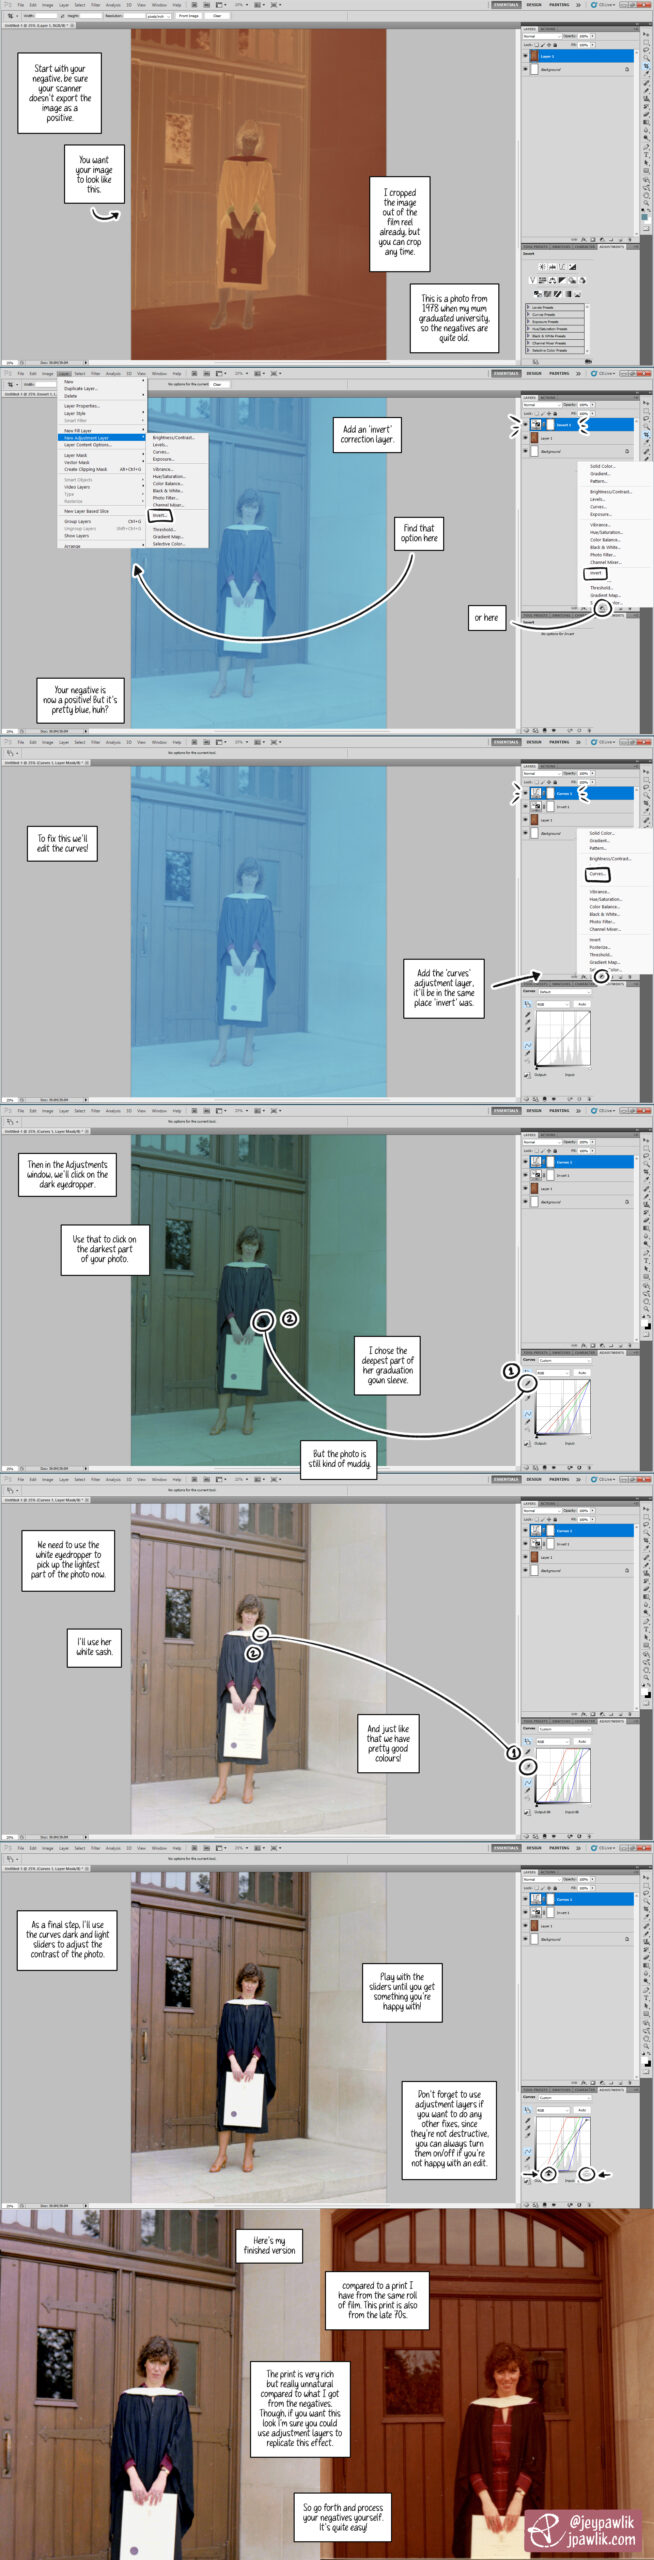
I got back into film around two years ago and I’m still learning a lot. One of the things I really wanted to do was scan my own negatives. This gives me more control over my images and it’s cheaper in the long run.

So I ended up making this tutorial for myself a while back to help me remember the steps of the process. In this tutorial I used an old photo of my mum from the 70s at her university graduation. It was a good negative to test because: at the time I was waiting for my lab to finish developing my first roll of my own film, I wanted to try processing a negative to make sure I could do it myself (and if I couldn’t, I’d ask my lab to continue doing it for me), I have prints from these negatives that I can compare with.

I’m using Photoshop CS5 for this tutorial.

Q&AAll Art (without update posts)Photography