Tone Your Art to Match the Tone of Your Story

Hey folks, here’s another talk turned blog post for you all on this fine Friday. In July I did a talk for the Cartoonist Coop’s Summer Camp and thought I’d bring that to y’all in written form!
If you want to watch the talk, you can find that right here.
This was actually a requested talk, so thank you to anon who requested the coop staff to ask me to do this talk.
I’ve been working in comics for a while. My comics list keeps growing and I keep trying new things with every one I work on. I’m currently in the process of working on some new comics so this is the perfect time for me to chat about:
Toning your art to match the tone of your story!
What do I mean by toning? Well when I say “toning”, it refers to how you fill in your lineart.
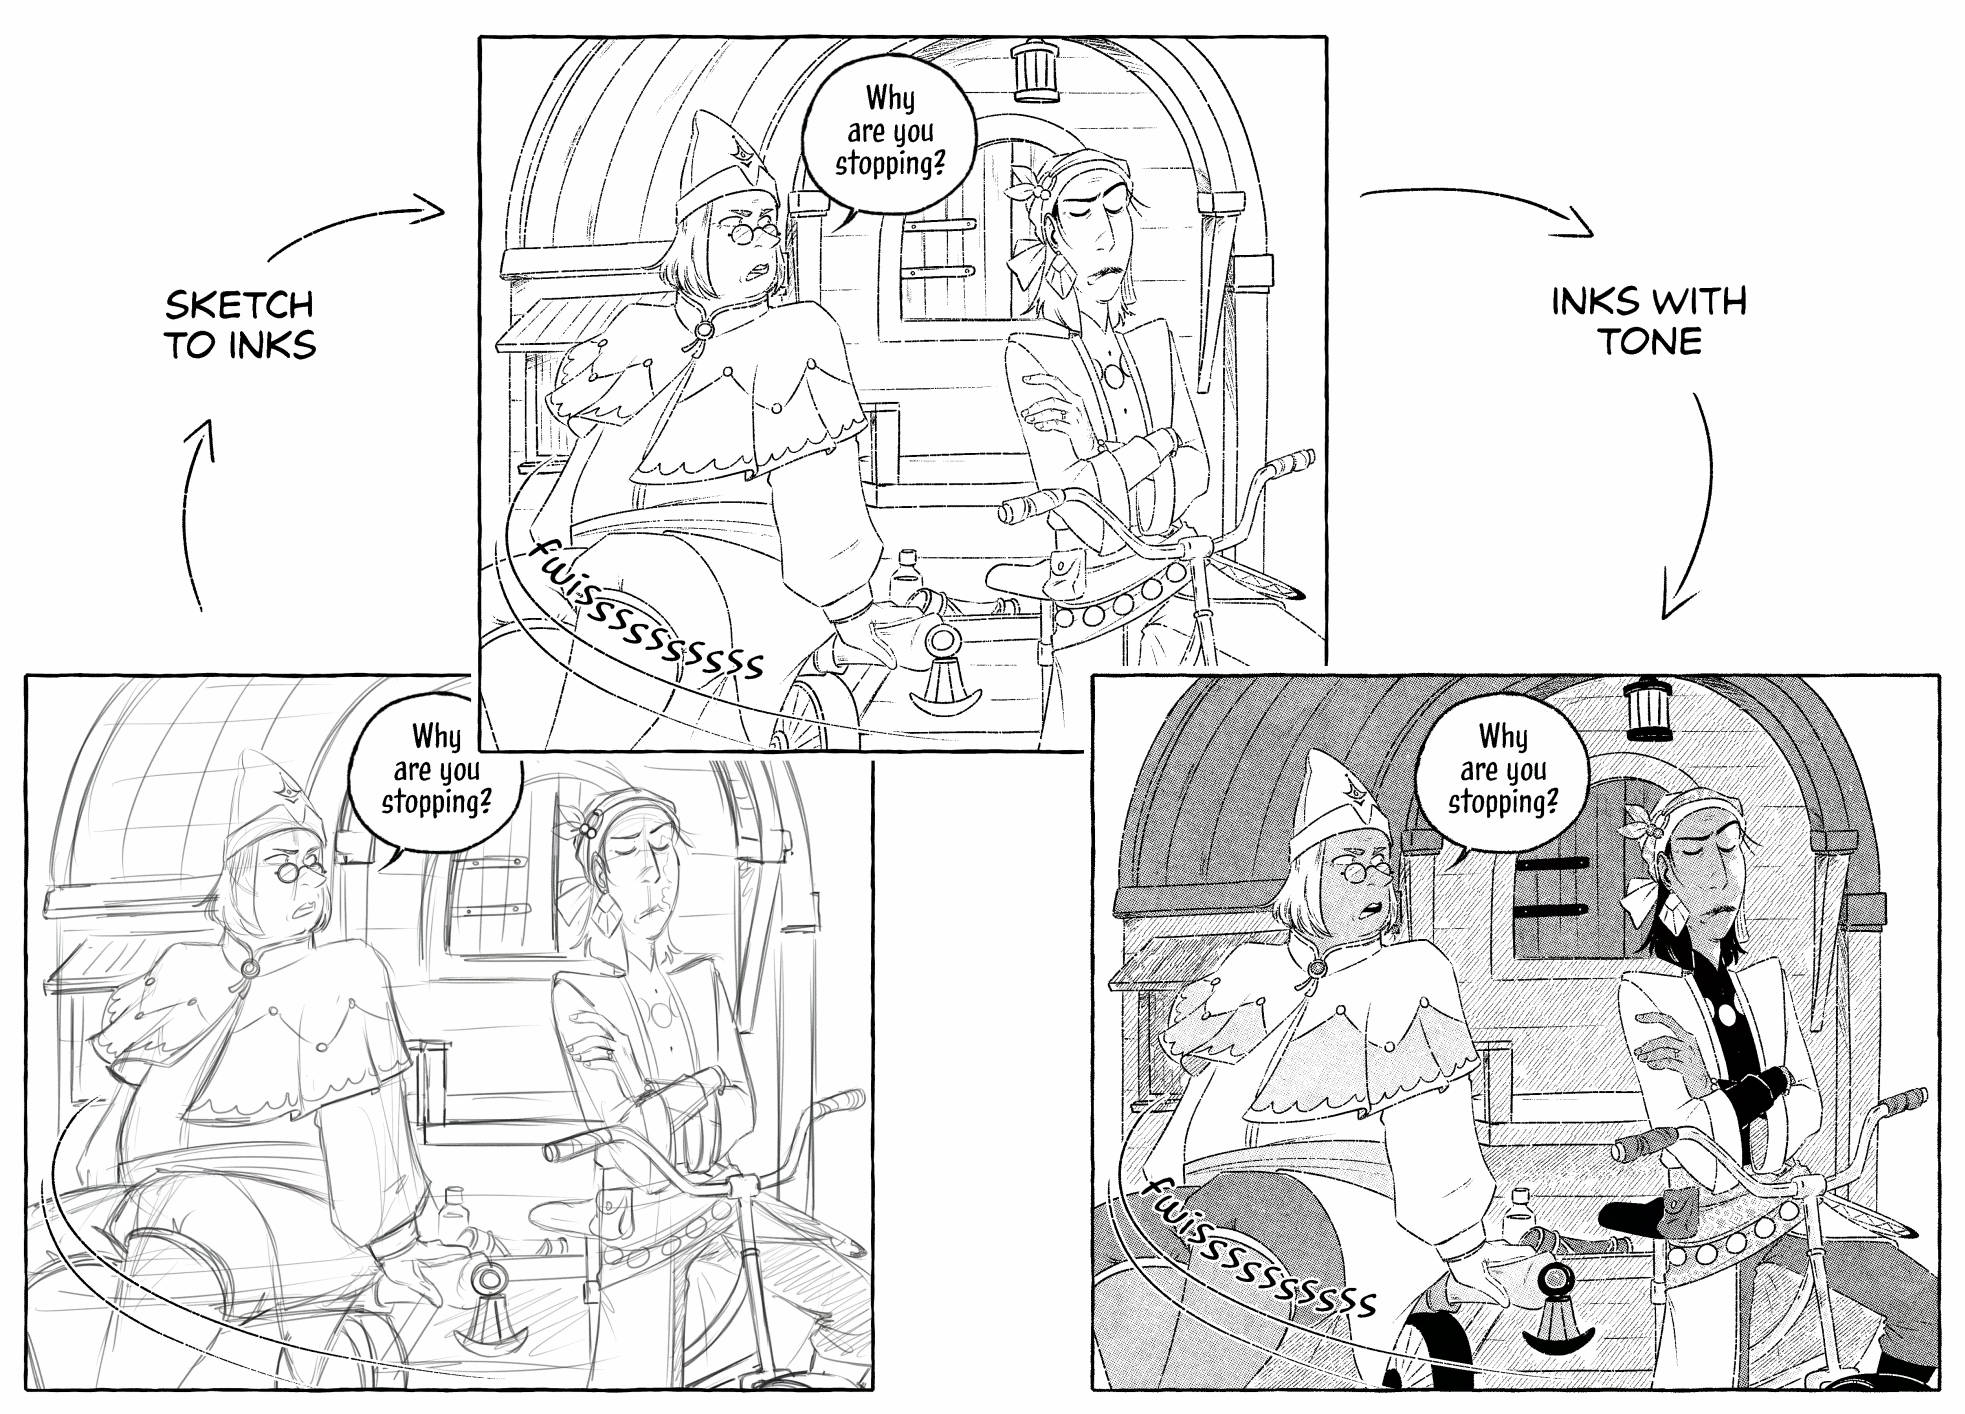
Usually the process (for me at least) is sketch > inks > tones, as shown here ^
There’s a LOT of different kinds of ways to tone your comics but for today I’ll just chat about the ones I’ve done and am familiar with. Here’s some examples of tone styles I use frequently or keep coming back to. I primarily work in black and white so I’ll mainly be talking about toning from that standpoint and I’ll keep singing its praises throughout the talk~
So how do I go about matching tones with the tone of my stories? As you can see I’ve got quite a few different genres and styles up. While I have my favourite inking brush for all my newer comics, I try really hard to change up the toning styles a little bit per comic. This might just be a personal choice but I like all my comics to look just a little different from one another and it gives me the opportunity to try out something new instead of behind stuck with one style for ever.
And since I have my favourite inking brush that stays the same throughout the comics it’s been a fun and challenging task to find new ways to tone my lineart. I like to find tones that match the lineart and are easy to use with it because it is a bit of a finicky brush with lots of little gaps, but ohhh do I like the end look so much. It’s worth it. Finding tones that feel a bit more traditional or give a really interesting look are things I tend to lean towards.
In order of appearance above:
Dead City was my first big comic, written by my wonderful spouse Max Parker. It ran from 2013 to 2020. Dead City was all traditionally drawn but toned in Photoshop. I only used 50% grey throughout the comic. Because it was my first comic, I wanted to keep things as simple as I was able but showing JP as a person of colour was very important.
Later on for the final omnibus book I did go through to re-letter and re-tone the whole comic where I did bring in a few more shades of solid grey and hatching where there hadn’t been any previously. I also highly recommend, if you’re going to use say 50% black on your comics, to make a swatch for it instead of making the layer 50%. I had to go back and fix like half the comic’s tones because I had switched part way from layer opacity to a swatch and they DID look different.
Alola Darumaka, also written by Max, was the comic I worked on right after Dead City so there were similarities in how I worked. This comic is a 4-koma comedy comic so keeping it flat with a little screentones added made it feel really easy to read and to draw as well. I chose 4 shades of this pink colour to use, one because they’re cute, and two I find that limiting myself in terms of palette can produce better results than if I’d gone with the whole spectrum. You can see my palette on the right is organized by colour and is limited to four shades per colour.
For the screentones on Darumaka, I started in Photoshop way back in 2019 using Kyle’s screentone pack. Then I moved to Clipstudio in 2020 and everything changed. Clipstudio has this neat function where you can turn a layer in to tone and use whatever brush you want. From there I change the layer colour to match the palette of the comic.
Oh Joy Sex Toy, I worked on monthly comics for them from 2021 to 2023 (and ohhh big news I’m coming back to it!) Oh Joy wants the comics to be lighthearted and fun, but also readable on mobile so flat colours, again, were the way to go here. I chose my 4 main teal colours to use from my palette and off I went! Sometimes branching out to another spot colour or two for emphasis, as you can see from the pinks in the background.
I primarily use the fill tool for these comics and then try my best to fix any gap issues as they come up, but I prefer to paint on my tones to get a more accurate edge on my lineart.
After All, a short NSFW comic, was re-toned a few times until I was satisfied with something. Short comics are so GREAT for tone experimentation! Try something out, how does it feel? Don’t like it? It’s only a few pages so try something you DO like. I ended up going with just line hatching tones on this one and I gotta say, it printed really nicely on my printer while using minimal ink versus the printer printing the whole page with flats.
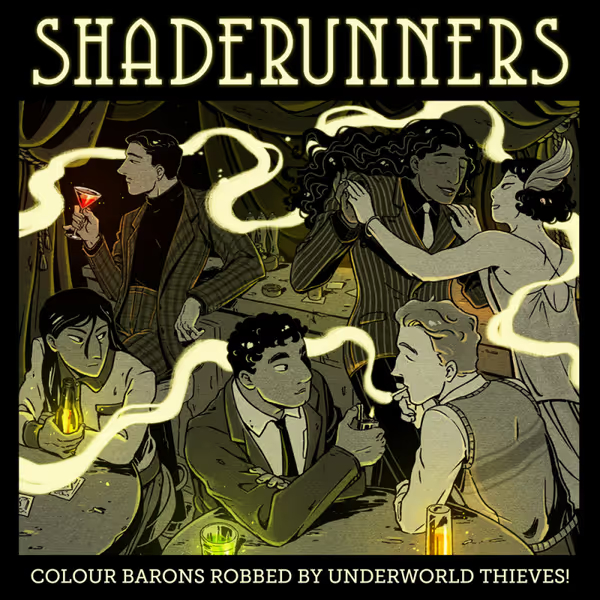
The Curtain Falls, a bigger standalone story and my first bigger solo comic. It’s got car chases, adventure, depression and the fear of aging! I’d been experimenting with a specific watercolour brush for a while and decided on using that for the whole comic. It has this really lovely texture that I felt really lent to the story well. It’s a build up brush so even while using a black swatch, the brush produces a really light grey so in order to go dark I layer the brush a few times. I do like this because it gives me a lot of control especially when lighting a scene.
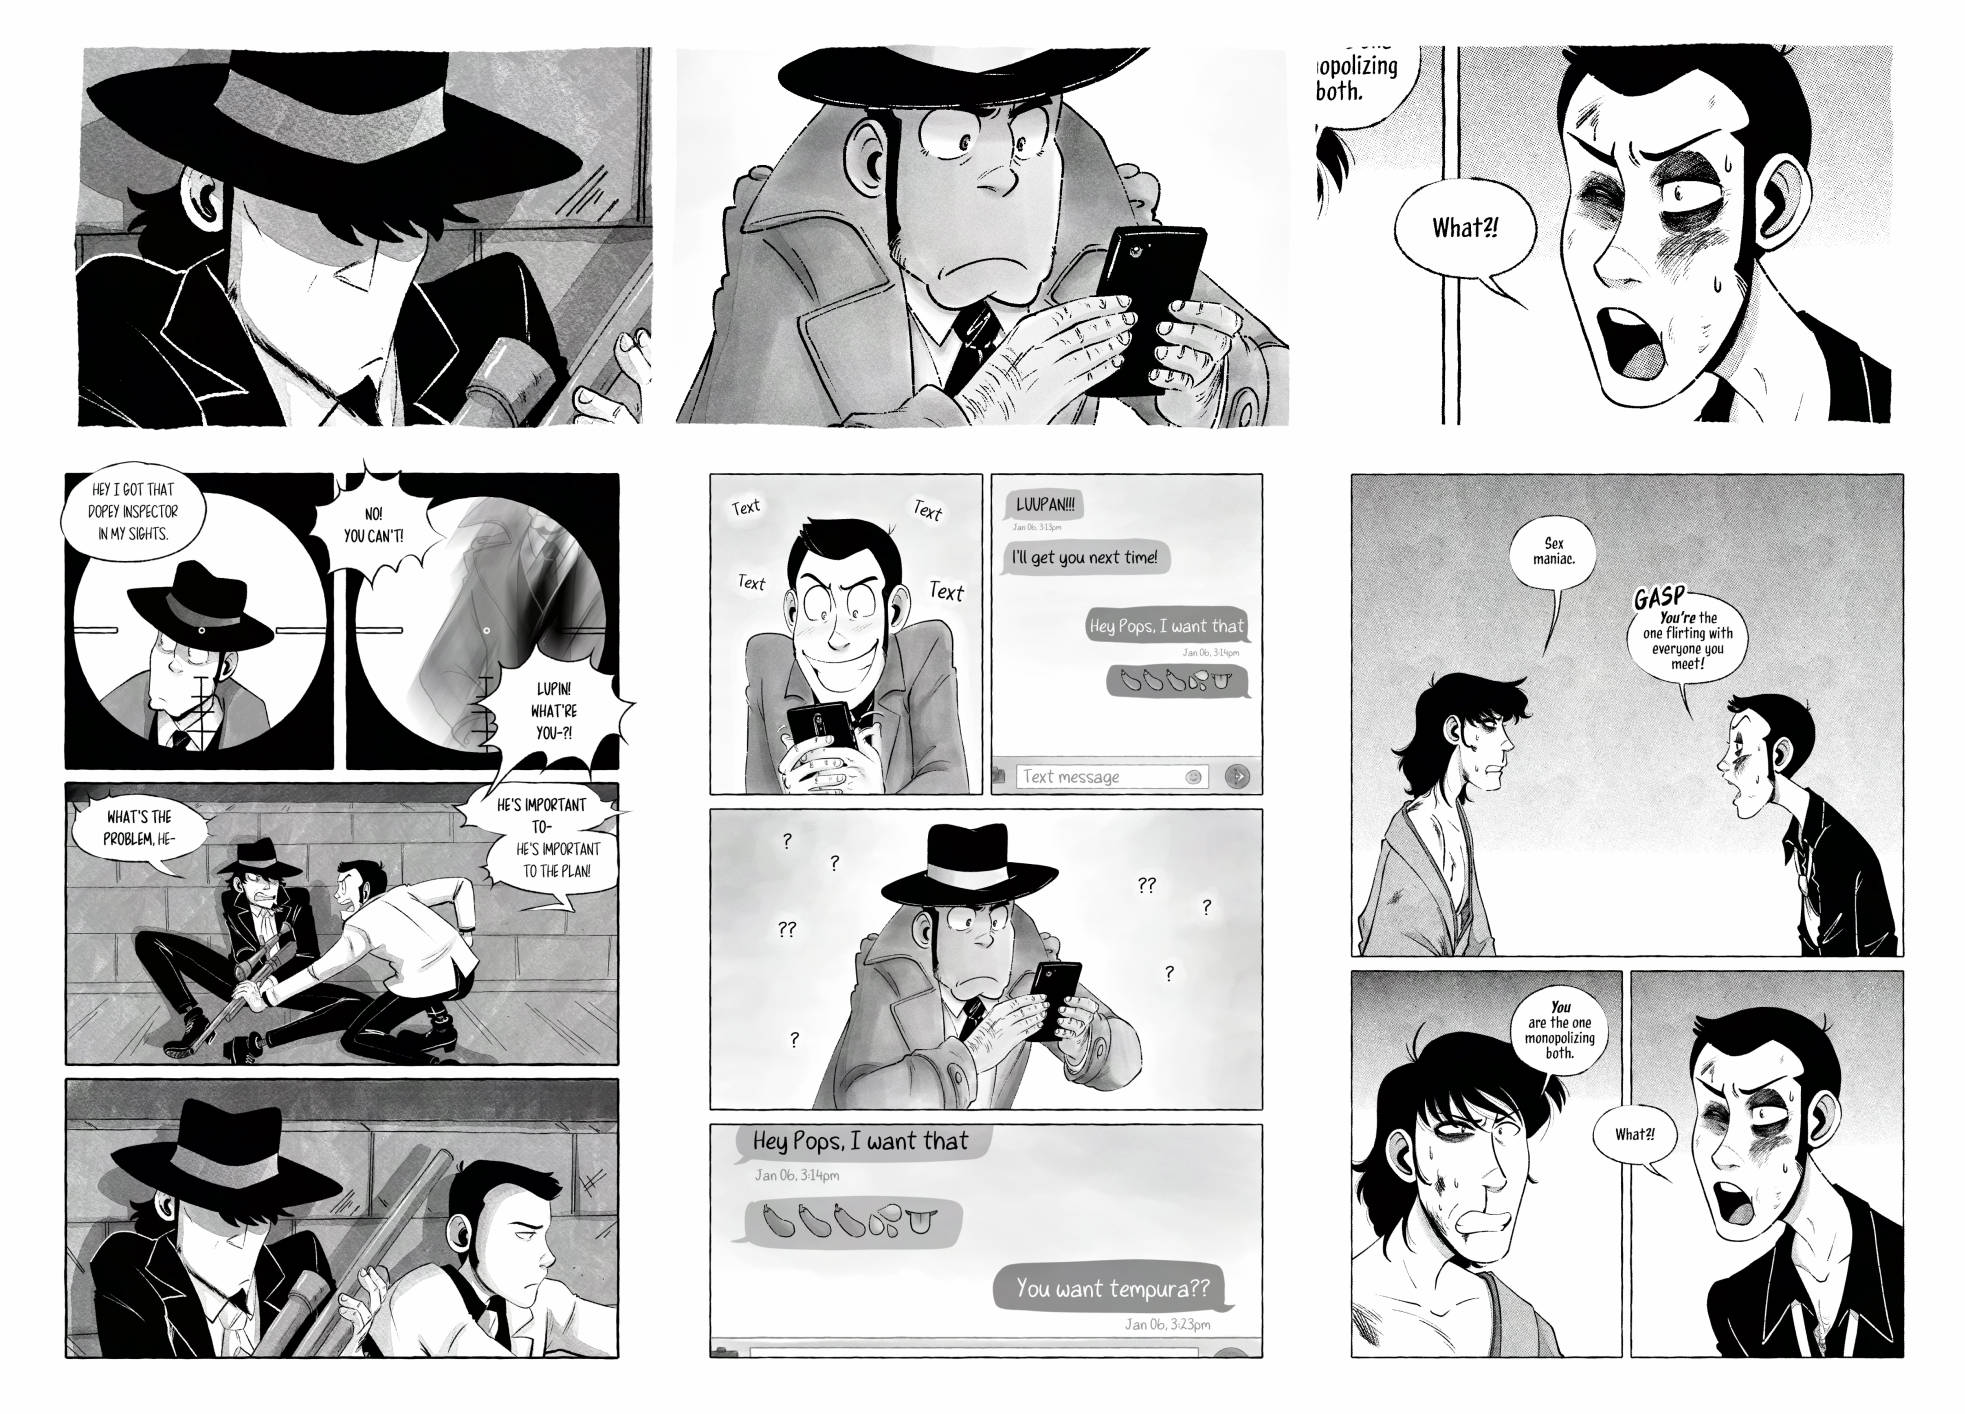
Jigen Now and Then, an upcoming fanzine Max and I did a short comic for. Now I know I said I like B&W best but sometimes on my own accord I will add colour if the story really calls for it. This comic is primarily in b&w until the famous Lupin the Third does show up, then and only then does colour return to Jigen’s world.
So something I want you to think about, and really think about is: does your comic NEED colour. Does it lift up the story and does it play a part at all? Would the impact of the pages feel the same in black and white?
My comic Gender Slices and my HRT Diary follow up are strictly black and white! There’s almost no toning at all and that’s also by design, to keep it as quick as possible to make and to keep printing costs down.
B&W is so much cheaper to print than colour so I want you all to keep that in mind when thinking about your comic and colour. I’d looked in to printing my OJST comics and they were 2x the price in colour than they would be in b&w.
Lastly, The Curse Eater. I’ve only gotten into halftones in the last two years or so. The the base options that come with ClipStudio, while are serviceable, there’s just something about them that feel too clean for me, which works well for my 4-koma comic, but I wanted to try something with GRIT. So of course, when TrueGrit Texture Supply put out a halftones set I immediately grabbed it and started experimenting! Turns out, I DO like halftones if they’ve got some kind of roughness to them. TrueGrit also released their Halftone machine, which then really solidified trying out halftones on a longer comic.
EXPERIMENTATION!!!!
I’ve been playing around with tools and brushes since I switched to ClipStudio in 2020. A lot of the brushes I’ve downloaded are just on the Clipstudio asset store, which I HIGHLY recommend trying out There’s actually thousands of brushes to try for free. Occasionally I’ll go on a brush downloading spree and try them out on one drawing while also taking notes during the process.
I mentioned TrueGrit already but go check them out! The coop has a discount with them so please give them a shot, their tools are such high quality.
Once you find a few brushes or tools you kinda like, try some 1-2 page comic with them. One-shots are honestly the best way, in my opinion, to try new tools out and get better with them because:
1. You’re not locked to a style for a long series (not that you NEED to keep the same style throughout a webcomic mind you) you just need to get through these 1-2 pages with this tone then you’ve just got a comic now!
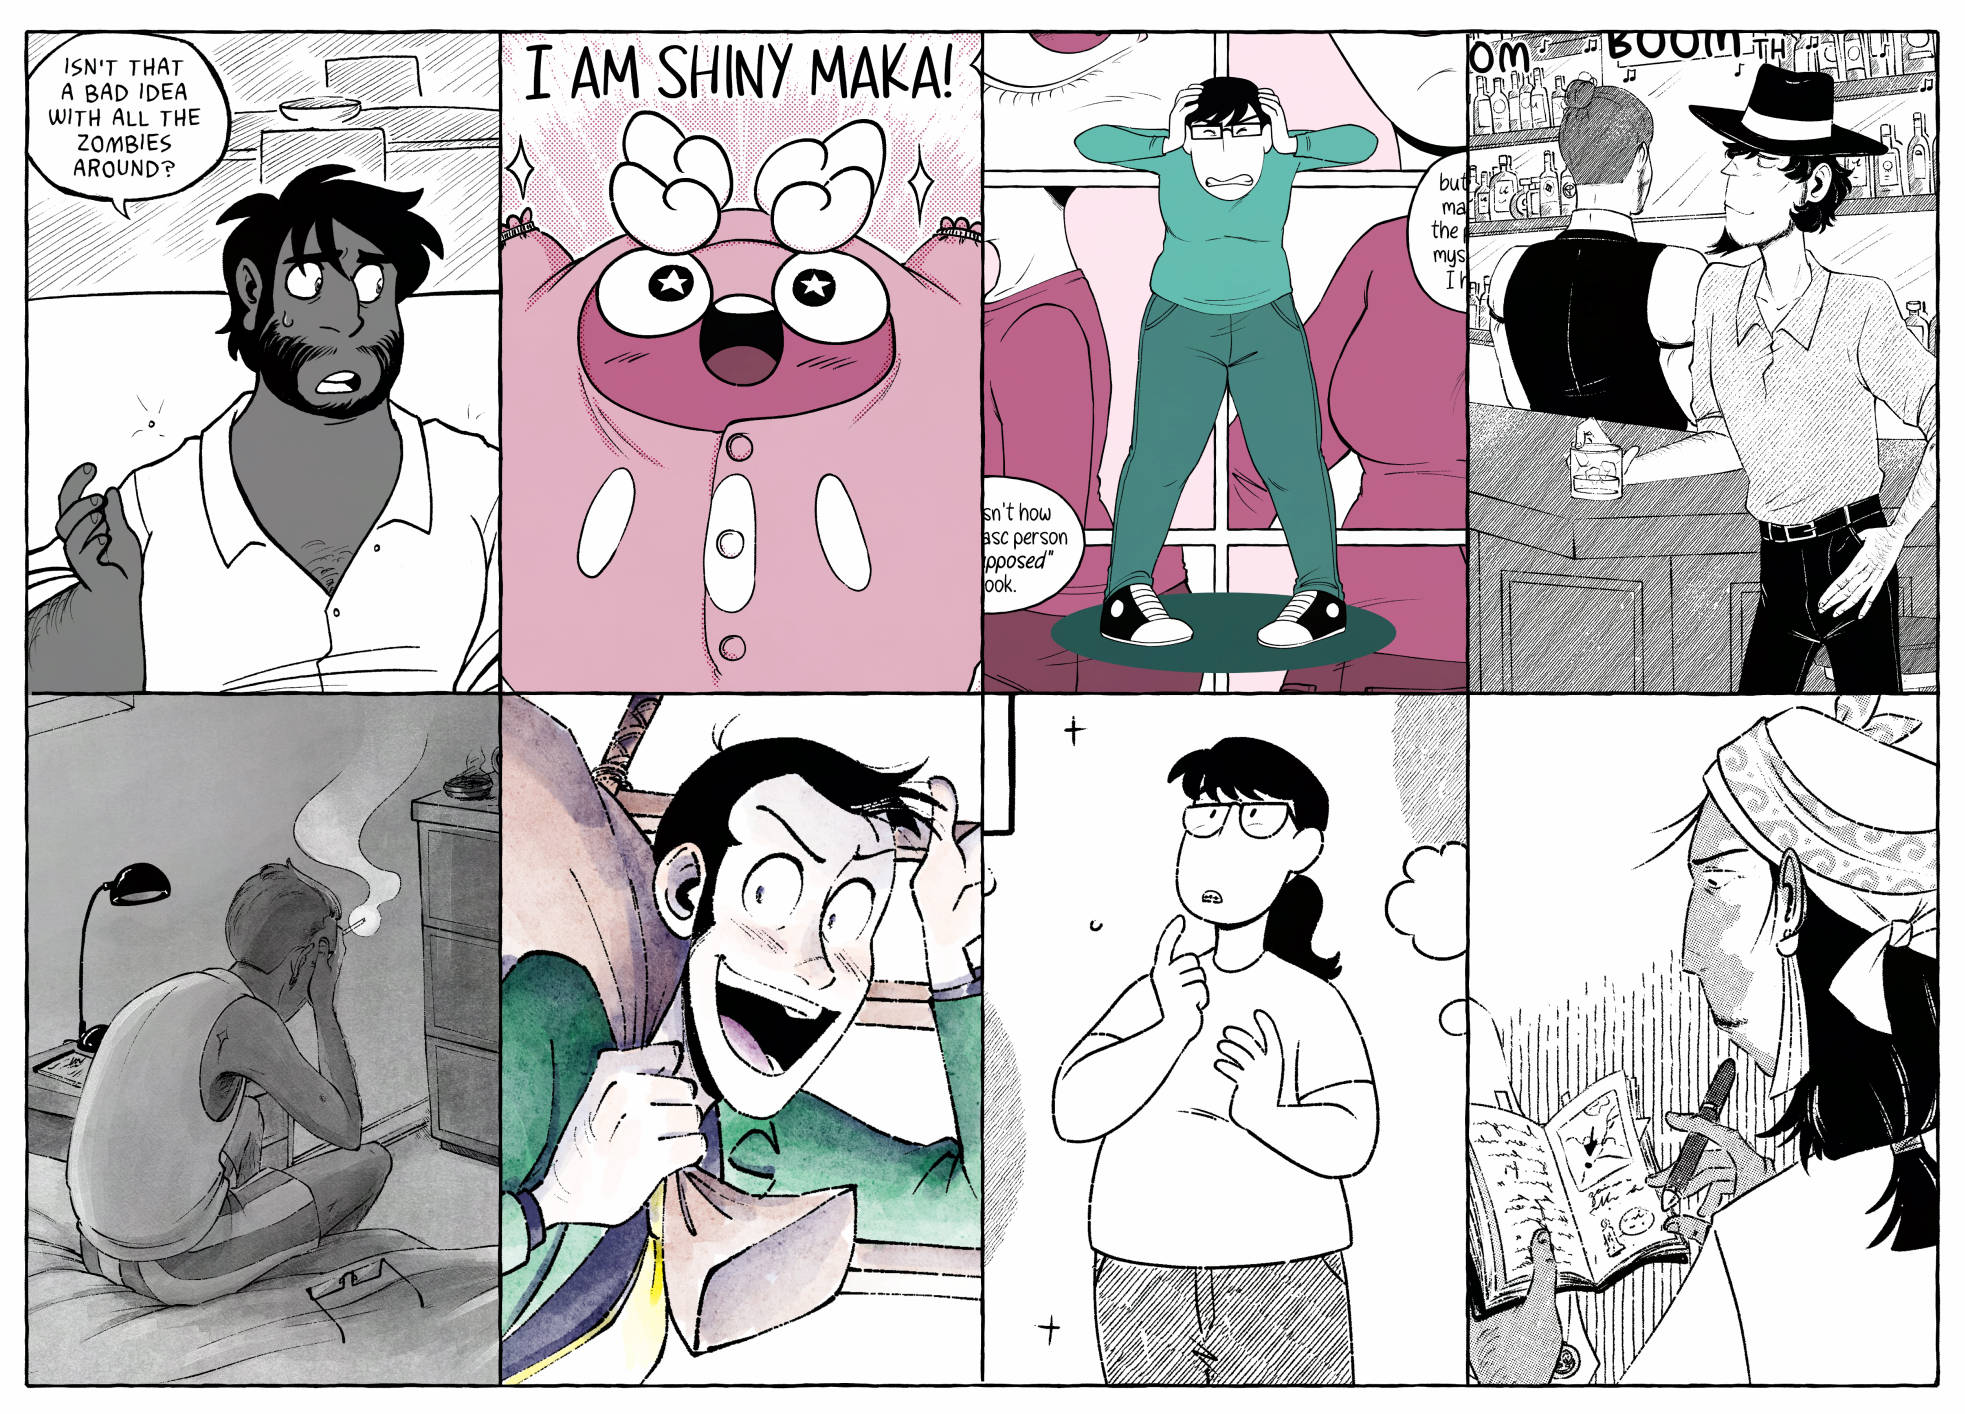
2. You can try some completely new brushes that you may love or you may end up disliking, like I did with this middle painterly style. It was fun to try but ultimately I didn’t end up liking it. Don’t like it? Drop it! but finish this short comic first, ’cause then you still have a comic.
3. While you’re experimenting, take notes for yourself. How did you like it? What are the pros and cons of the tools you were using? Did it make you faster or slower at a page? Did you like the process?
I’m just such a firm believer in one-shots and short comics for so many reasons! Please go experiment with short comics! Go wild!
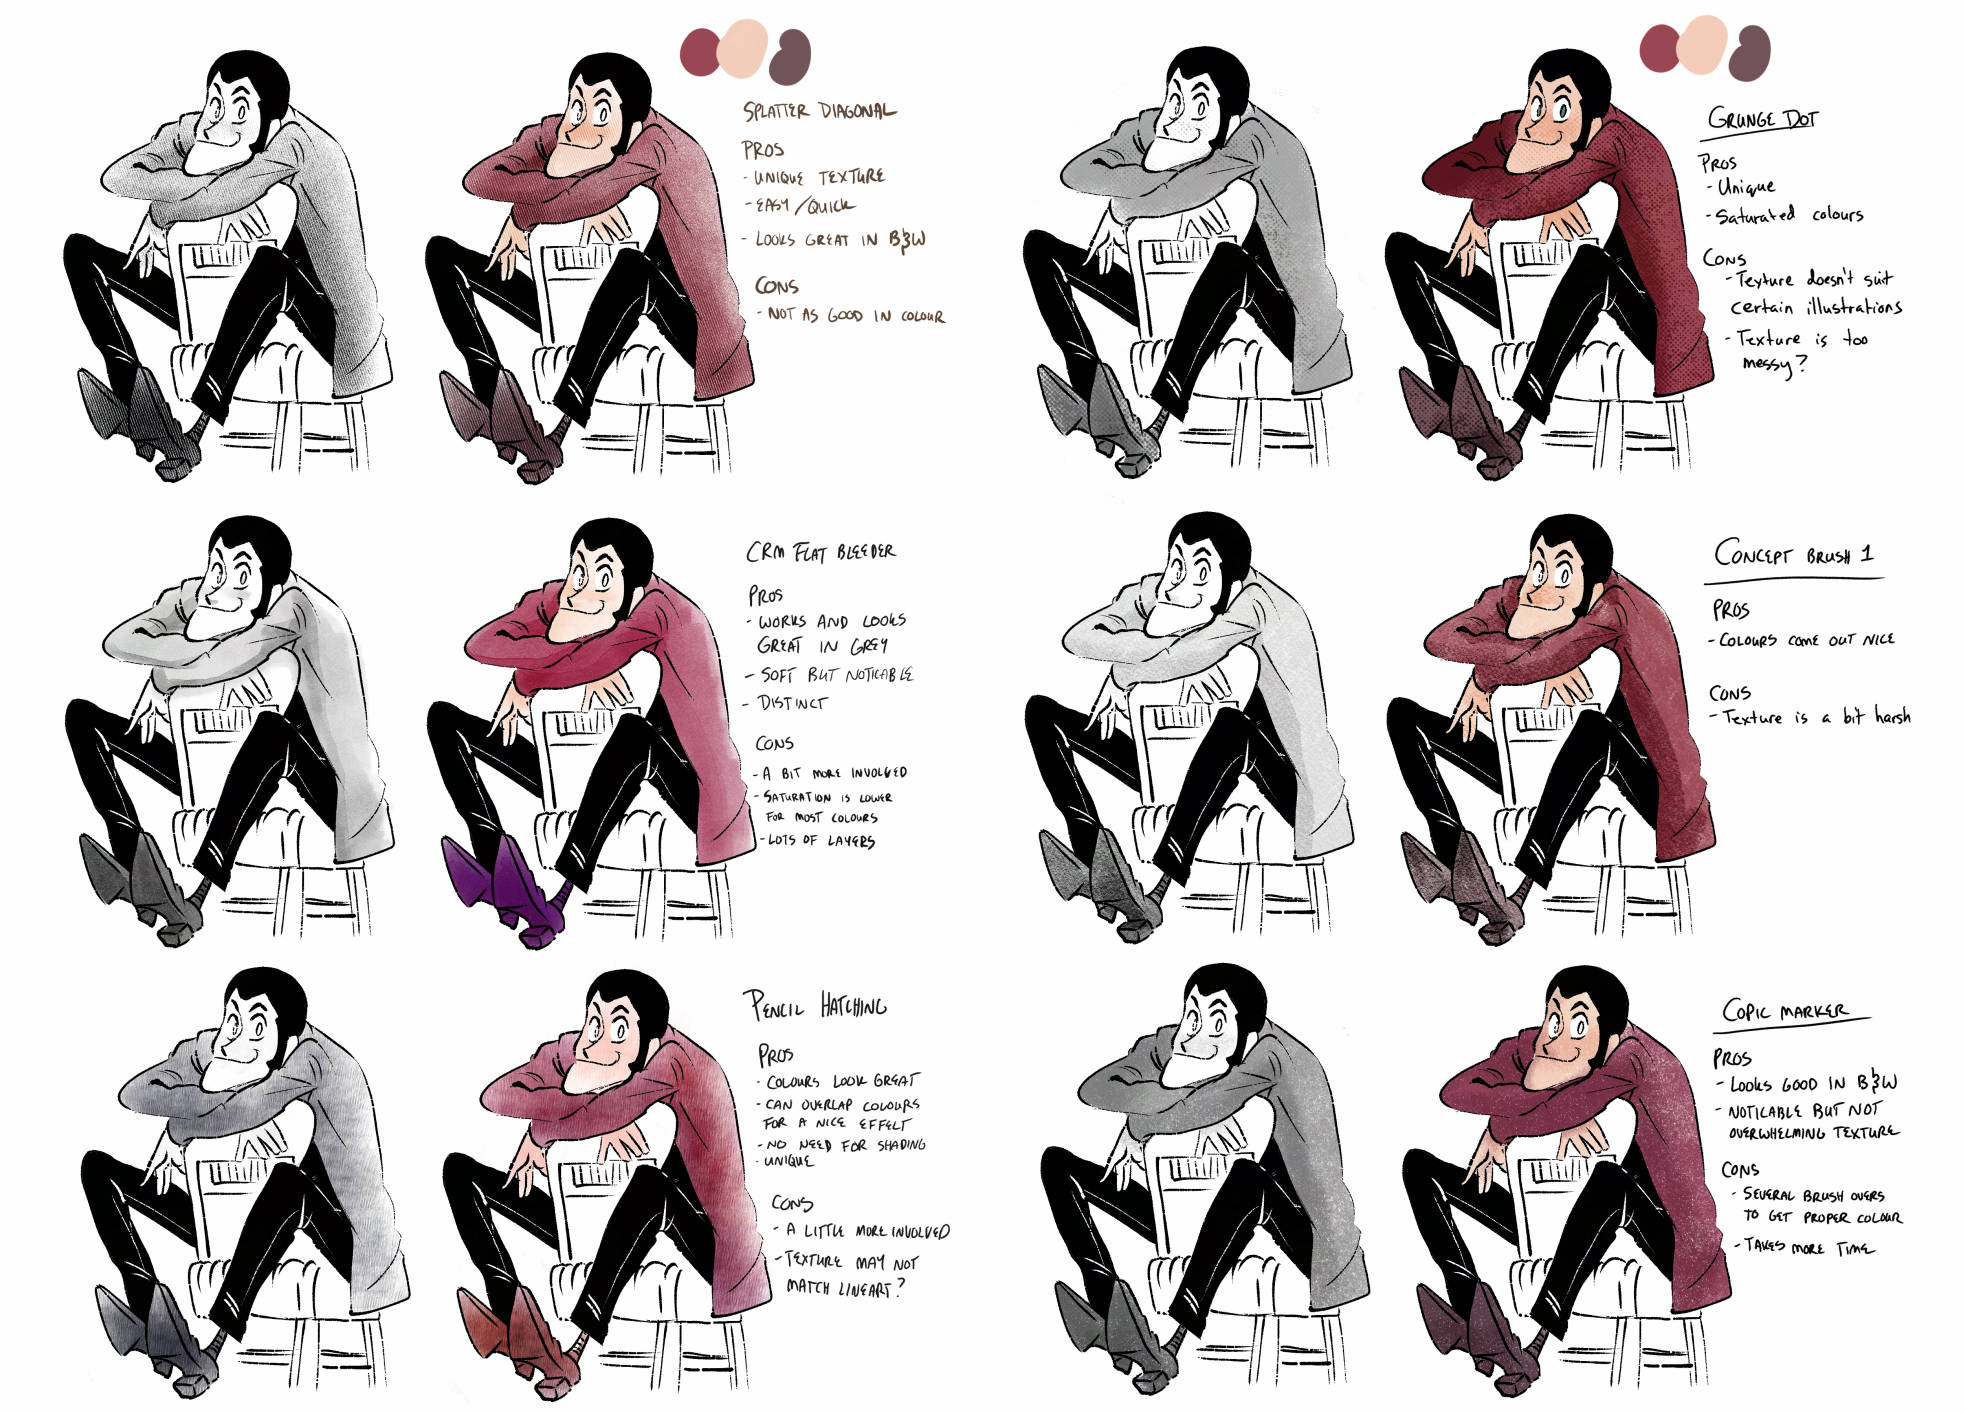
I’ll delve a little deeper into my favourite tools here.

Okay, me personally. I like TEXTURE! I thrive off tools that are easy to use but add just a little something unique to the comic they’re being used on. Bonus points if I can get the comic page done quicker but it still looks NEAT!
May I introduce you to my favs:
Ron Chan Watercolour Tilt Brush
My edited Ron Chan Watercolour Tilt brush. This has been my go-to for around 2 years now. I just keep coming back to it. I did add a different texture to it and I thiiiink I altered the sensitivity on it but I got it where I really want it now.
Bonus points on brushes where I don’t have to change the swatch. This is all just black being adjusted by how much pressure I’m giving it or building the brush up. Tilt and zoom also effect how big the brush is and gets, I don’t have to change brush sizes? AMAZING! I love that.
I’ve only toned a few comics solely with this one but it’s got a lot of different hatching styles on it. It prints really nicely and saves me a lot on ink.
I normally use it along side one of my other tools, like using it to shade on top of halftones for extra texture and depth.
I also grabbed this a few years ago (before the coop was around) and it really changed how I felt about halftones. I liked these new textures. I liked that I could have pressure sensitivity on some of them. I liked that the lines could be combined with the dots and I should really do a short comic with just the combo dots soon.
Okay but then everything REALLY changed when TrueGrit announced the halftone machine. I bought it the week it came out and I’ve done most of my halftone style comics in it. It’s an absolute game changer and LET ME TELL YOU WHY.
It’s not a brush, it’s a folder you pop on top of your art. Not unsimilar to how ClipStudio’s base halftones work.
Similarly, I can use ANY brush I want with it. My RonChan tilt brush, a gritty texture with lots of transparent holes in it, a patterned brush???
It’s quickly become my favourite tool for toning. It has quite a lot of options for dot style, and because I can use whatever brush I want I can alter it per comic to give each comic a little something new, something more unique than the last.
Heck I can even flat tone with it for a really easy, quick, but good looking result.
I think Truegrit should sponsor me.
Lastly for my tools I’ll chat just a bit about my printer. I print all my own short comics myself on my Brother HL-L2370DW b&w laser printer (which I just found out is discontinued!! but I love my little work horse so much)
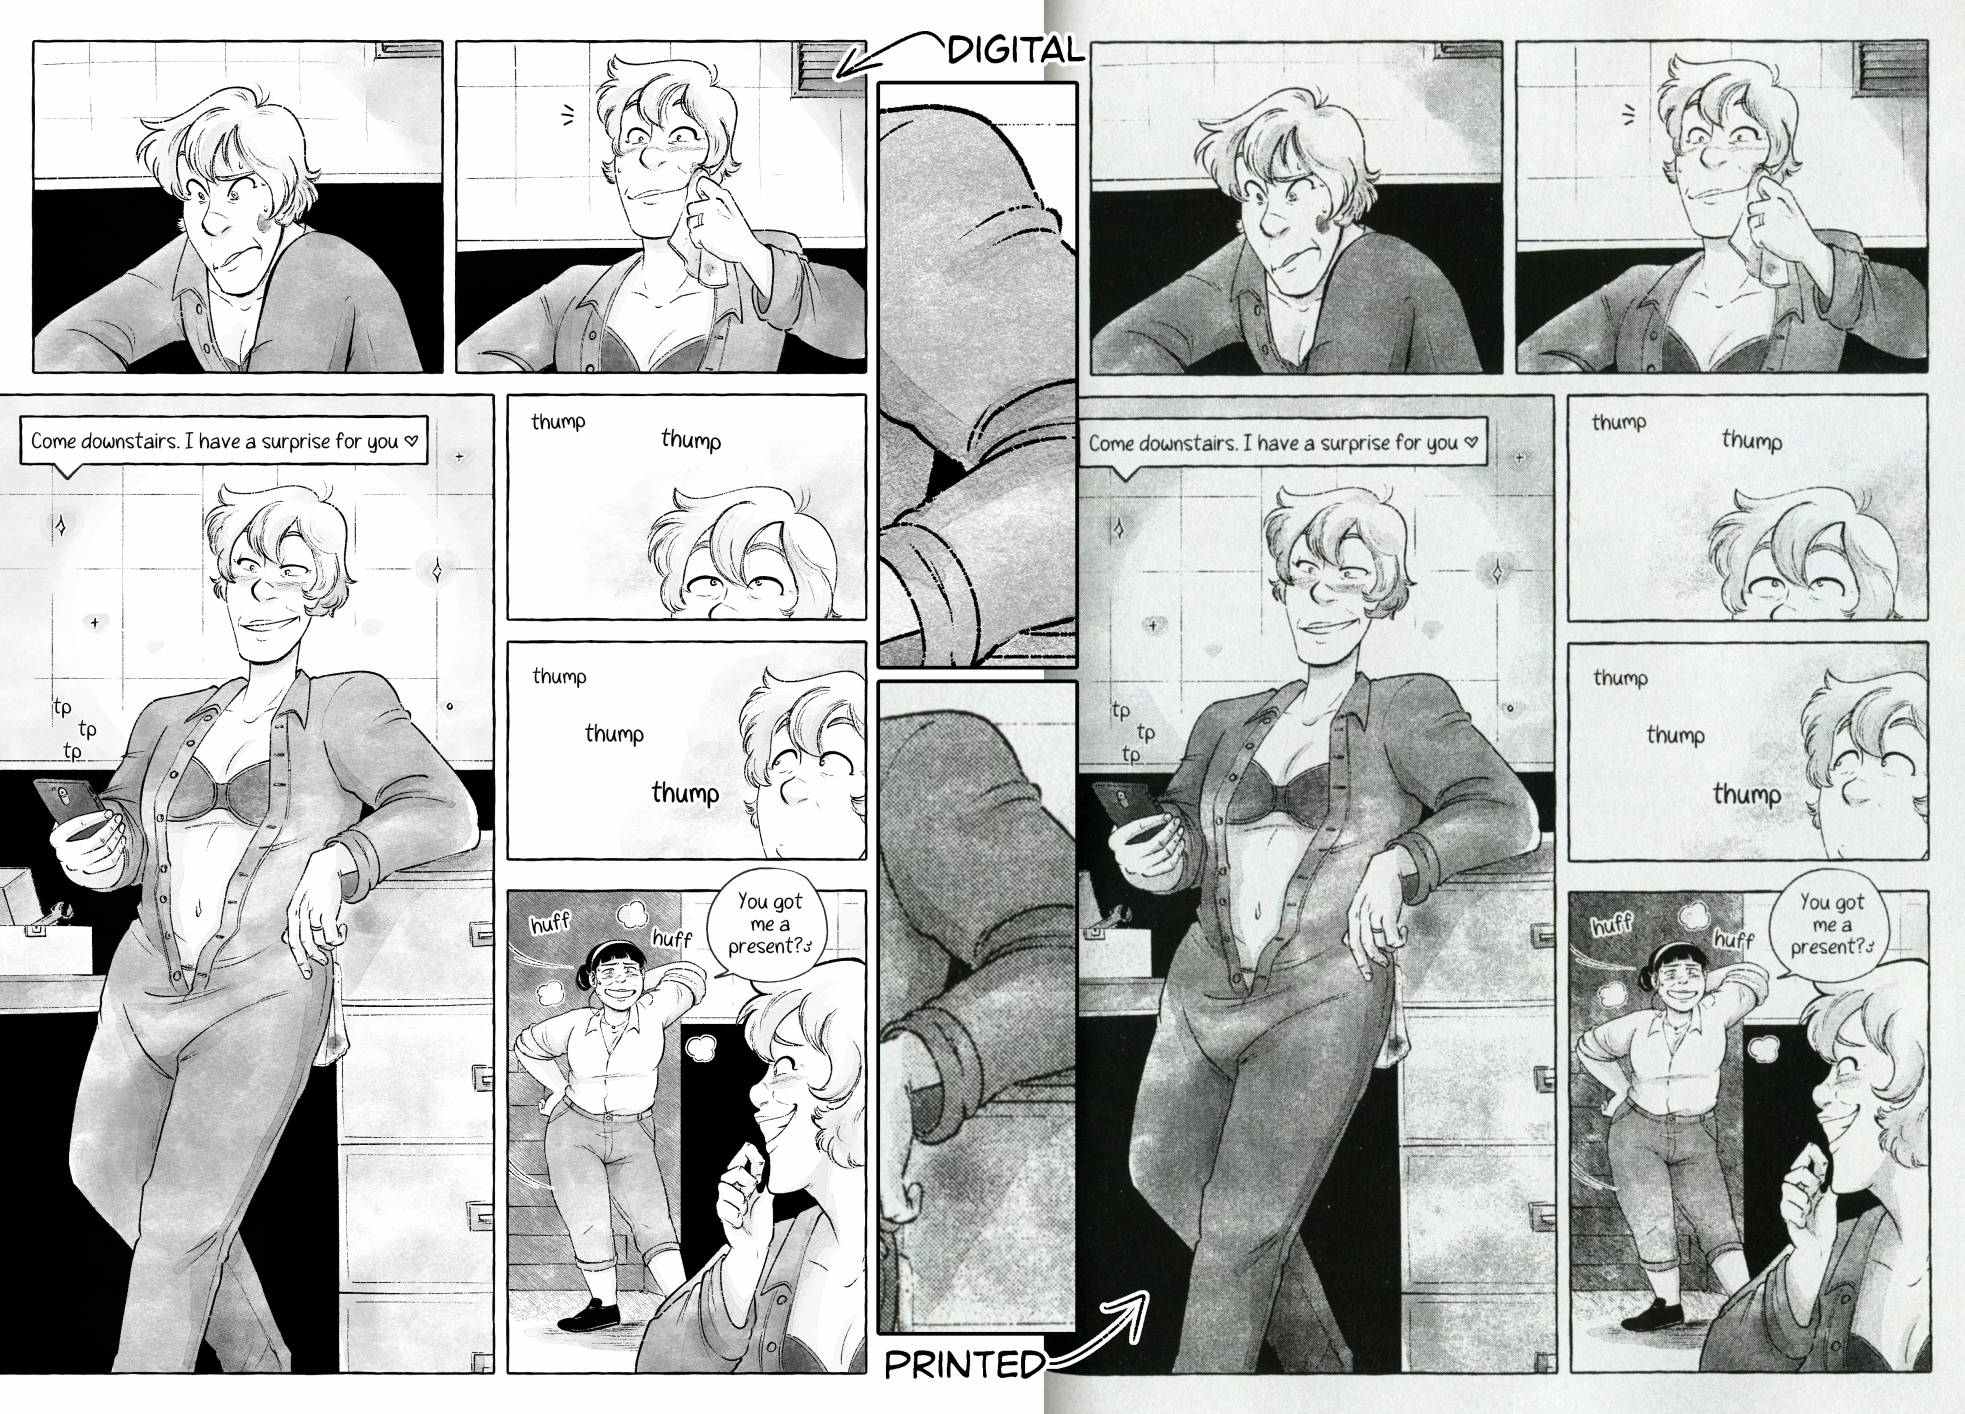
The neat thing about laser printers is they also work on a dot system, so when you print grey tones they do appear as halftones which can give your zine a really neat final look. Here’s a scan and a zoomed in panel from one of my zines where I was trying out a textured watercolour brush.
I really like the look of the printed copy, moreso than the digital. Again, that’s a personal preference. But something to consider when buying a printer.
And if you do get or already have a printer, I highly recommend printing out a test page of your comic ESPECIALLY if you’re using halftones so you can get the dot size right — too small can give it a weird look, but too big and your lineart can get lost.
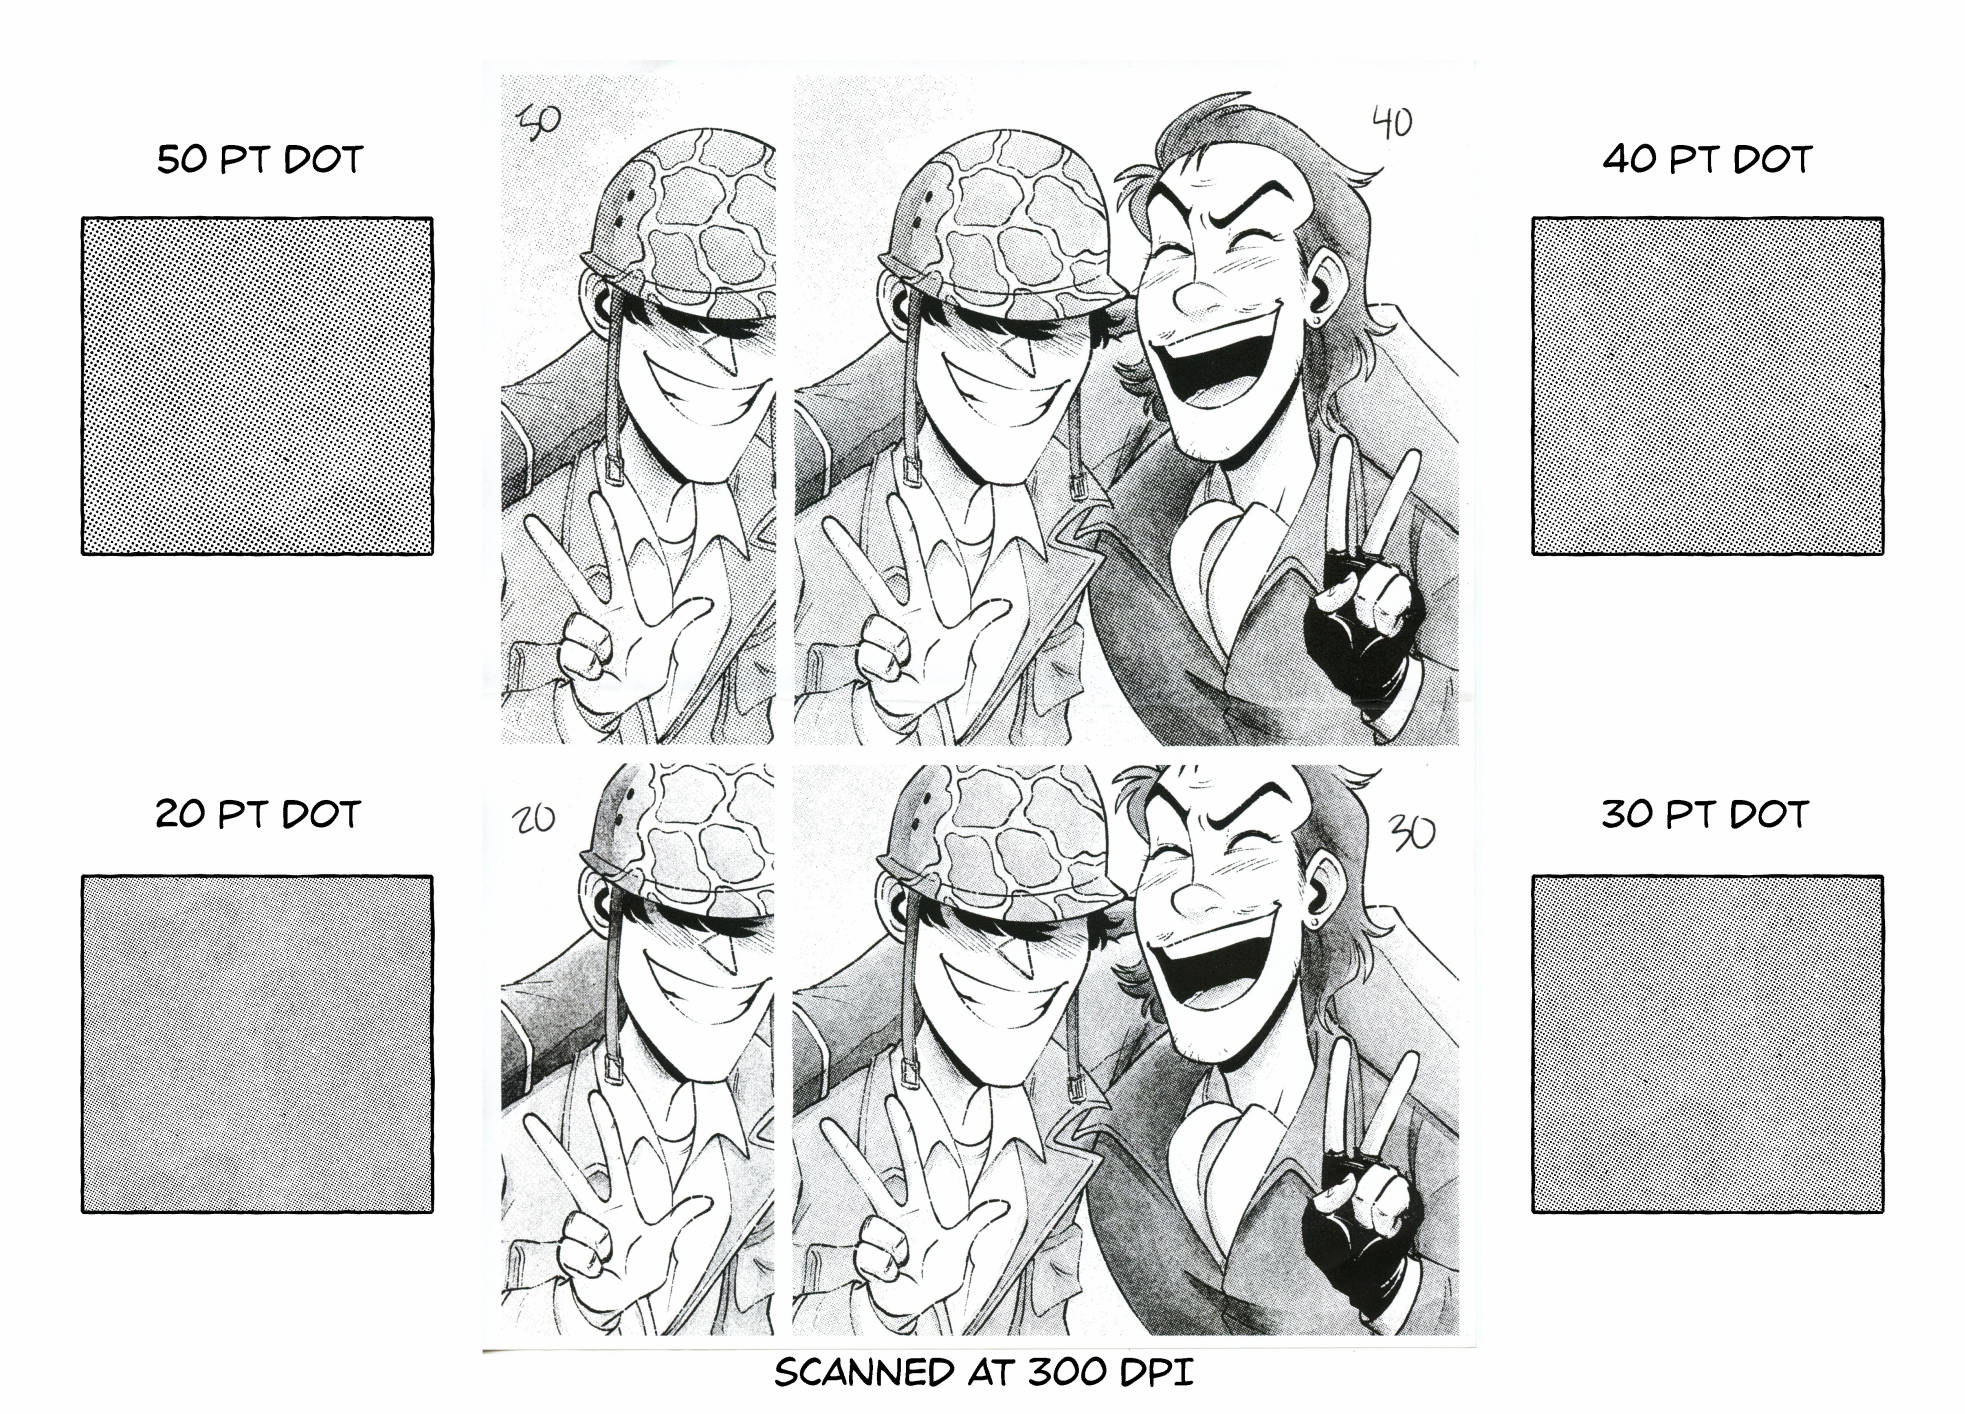
I like to keep my dots at 30 or 40pt depending on the dpi and page size, but this gives me a nice small dot without looking off. You can see on my screen that the 30pt dot does make an odd pattern but once I zoom in it looks normal. This is why I recommend printing a test page, because I would have assumed the 30pt would also print weird but as you can see in the scanned copy beside it, it turned out alright!
Again, all this is up to preference but I wanted to give this talk to encourage you to try different brushes, tools, and experiment. There’s an infinite amount out there so why not pick something up and give it a go?
Thank you for listening. If anyone wants I’m open to questions and am more than happy to clarify anything in the comments below.
If you have any other questions you can find me at jpawlik.com & topazcomics.com or on most social media sites. I’m always happy to chat on the coop discord or for something more in-depth you’re more than welcome to email me.